Fine Art Photography
M. Plonsky
Biography
Equipment
Galleries
Purchase
Articles
Contact
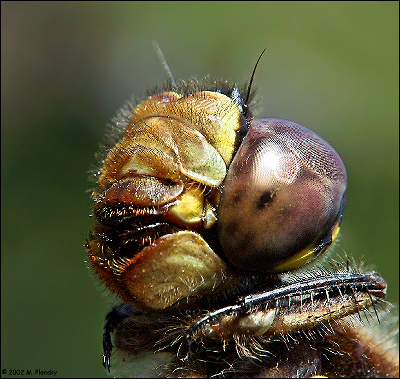
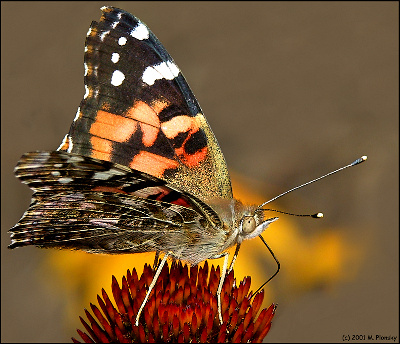
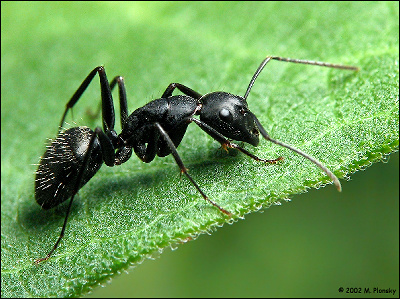
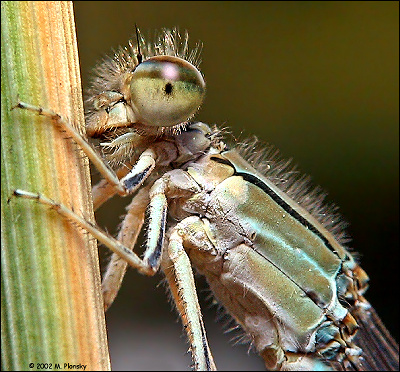
Bug Pictures (Insect Macro Photography)
An article on the techniques involved.
version 1.32, 11-14-03. All information and images in this article Copyright © 2002-2019
M. Plonsky
- Estonian (thanks to W. Pawlak)
- French (thanks to M. Guibert)
- German (thanks to M. Neumann)
- Italian (thanks to JJSapido)
- Italian (thanks to A. Soomro)
- Macedonian (thanks to K. Nestiv)
- Polish (thanks to M. Nielubowicz)
- Russian (thanks to A. Baeva)
- Spanish (thanks to J. Geldres)
- Serbian (thanks to B. Fiagic)
- Swedish (thanks to E. Karlsson)
- Ukrainian (thanks to O. Chervona)
Contents
Introduction Camera Settings Philosophy Lighting & Flash Camera Equipment Tripod or Not? Using Close-Ups (Diopters) How to Get Close Reversing a Lens The Digital Darkroom

Introduction
I am a professor (experimental psychology, not entomology). I had started scanning images back in 1989 for incorporating into my lectures that I projected in front of the classroom. I bought a digital camera in 2000 for family photos and to document dog behavior. The camera wasn't as good as I would have liked for the latter due to the slow auto focus and other camera specific limitations. I like the digital, though, because it makes it easy to try something and immediately see if, and how, it worked. Compact flash is like a continuous roll of film that I never run out of. Given my background, I tend to think of the camera as a scanner that you point.
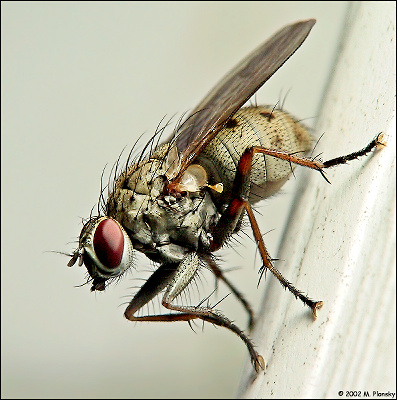
When I first got the camera, my (then) 5 year old son came into my office one day and suggested I photograph a bug that he had his eye on and we did. It was worse than terrible by my current standards, but it did allow us to see the bug in more detail than we could in real life. That is what got me started and what I enjoy so much about macros. They let you see what you ordinarily cannot. As a scientist, I am quite curious by nature. I kept shooting the bugs, had fun, and my camera was reasonably good at it. I also liked that as I developed skills shooting bugs, all of my other photos (dogs, family, etc), got better too.
The Internet (web) and photo forums have been my photography teacher. Thus, I am especially thankful to those who have given me honest and constructive critiques. I guess my dream is that one day my images will appear in children's books or other educational materials.
I am writing this article because when I post my images on the forums, people often ask how I do it. So I am going to try and tell you. Keep in mind that I am just an self taught amateur who is willing to experiment and has an insatiable curiosity. Thus, the internet acronym "YMMV" applies (i.e., "Your Milage May Vary"). Nonetheless, I hope this information is useful to you and enables you to have more fun taking and creating images.

Philosophy
Most of my bugs are photographed in the natural environment. I don't chill them, or spray them, or glue them, or nail them down. I will sometimes move some blades of grass or vegetation to get a better view. Even less often, I will try to relocate the bug to a new location. Nonetheless, they are always alive and well when I shoot them.
Occasionally I will shoot the critter on a building (white ones especially) or other man made structure. I especially like white buildings, because I can overexpose a bit and remove any remnants of the building in the digital darkroom giving the image a clean, studio-like quality.
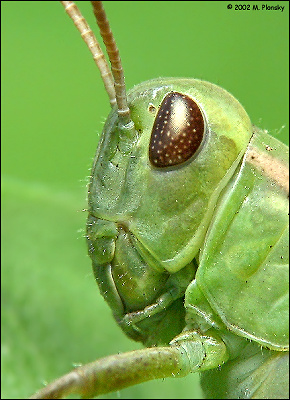
My goal when photographing the bug is to present it in a positive light; to show it at its best. I especially like intimate portraits, behavior shots, and full body shots with clean and smooth backgrounds.
Camera Equipment
Some pictures of typical setups I use are available.
- Canon Powershot G1 (35-103mm zoom) 3Mp digital camera
Recently upgraded to a Canon Powershot G3 (35-140mm) 4Mp - Lensemate adapter tube to allow filters to be attached to the camera
- Various close-up lenses (or diopters)
- Tiffen +10 & +7
- Hanimex +6
- Royal & Quantary sets (+3, +2, & +1 in each)
- Tiffen Megaplus 2x Zoom/TeleConverter (2xTC)
- Pentax 50mm F1.4 lens (a fast normal lens)
- Macro coupler ring (for attaching the normal lens in the reverse position)
some folks just glue two filters together - Canon 420ex flash
- Various Stofen Omnibounce diffusers
- Kirk butterfly bracket
- Canon off shoe cord (allows me to mount the 420ex flash on the bracket)
- Tripods & a macro focusing rail (or slider)
Using Close-Ups (Diopters)
A close-up lens (or diopter) enables the camera to focus closer than it normally can. This means that the image will appear larger in the frame because you can get closer to it. In other words, close-ups allow you to magnify the image. A diopter is, in fact, a magnifying glass.
Close-ups can be stacked. When doing this, the highest powered close-up should be the closest to the camera. I have stacked as much as +27. One problem with stacking is that the quality decreases because there is more glass and more light abnormalities and distortions occur. Another issue is that as the magnification increases the depth of field (DOF) decreases. With really high magnifications, the DOF becomes paper thin.
Still another important issue with close-ups is that you need to get so close to the subject. The distance from the camera's lens to the bug is called the "working distance". One of the techniques I use to increase working distance is to follow the close-ups with a 2xTC. In addition to the increased distance making it more likely that I can get the shot (by not disturbing the bug), it also makes it easier to get better lighting. A disadvantage of the 2xTC, though, is that some magnification is lost.
I have learned to try various "optical marriages", because some lens combinations work well together and others don't. For example, I tried diopters after the 2xTC, but the results weren't very good. It was a poor "optical marriage".
Reversing a Lens
While stacking bunches of close-ups gave me some great shots with good magnification, I wasn't really satisfied with the technique. I found that stacking more than 2-3 lenses wasn't really worth it, since I rarely could obtain the quality I desired.
I had read about a technique involving reversing a lens to gain magnification in web articles such as that written by Chris Breeze & Guy Parsons, as well as in John Shaw's book "Close-ups in Nature". It is sometimes called "a poor man's macro".
To do this, you first need the lensmate adapter, followed by a macro coupling ring (which has male threads on both sides). This permits you to reverse the lens and attach it to the macro coupling ring, by it's filter threads. Links to where you can find this equipment were presented in the previous section on Camera Equipment.
I first tried this technique with a Canon 35-80mm F4.5 lens, but the vignetting (i.e., a black circle like frame on the image) was prohibitive. So I went to a camera store with my camera to check out the 50mm (i.e., normal) lenses. I wound up buying a Pentax 50mm F1.4 lens. The F1.4 means that it is a fast lens (i.e., it lets in a lot of light). With the G1, there was minimal vignetting (a slight darkening of the corners) and with the G3's increased zoom, there is none.
Folks often ask me questions about which is the best 50mm to reverse. My advice is to do what I did and go a camera store and try out some lenses. In other words, you have to see for yourself which "optical marriage" will work. For just trying out a lens, you can just handhold it in the reverse position in front of your fixed lens (rather than bothering with the macro coupling ring).
The reverse lens acts as a powerful (about +25) and high quality diopter. I have to be about 1.5 or so inches from the bug with this setup. Also, you will typically need to use full zoom to avoid vignetting. I set the 50mm to its widest aperture (in the case of my Pentax it is F1.4) and set the focus to infinity. Then I do the rest with my camera.
Camera Settings
Here are some tips:
- Use manual focus. Lock the focus and then gently rock the camera back and forth until you find that sweet spot (where the image looks crisp in the LCD). This takes a lot of practice.
- Use full zoom in situations were vignetting is likely (e.g., if using a 2xTC after some stacked close-ups or using a reversed 50mm lens).
- Use a small aperture (large F value) to maximize depth of field (the amount of the image in focus). The more magnification, the less depth of field.
- Fill flash is usually a good idea. The majority of my shots are at F8 (which is the smallest aperture a prosumer digital camera gives) with fill flash.
- I typically use aperture priority (Av) with F8 (the smallest aperture my camera gives).
- I also use manual mode a lot. On the G3 it enables higher shutter speeds with F8, but the quality of light is different and the backgrounds are often darker.
Lighting & Flash
Here are some tips:
- Shoot on bright days so you can get a decent shutter speed. Bright overcast days are expecially good.
- If you can afford an external flash, it really makes a dramatic difference. It gives a lot of flexibility and control.
- If you do use flash, it needs to be diffused (e.g., a tissue) or bounced (e.g., off a white card or reflector). Pointing the flash indirectly is another possibility.
- The 2xTC after the close-ups can help with lighting since it is easier to illuminate the subject more evenly from a distance.
- A butterfly bracket (and off shoe cord) for the external flash will give you even more control of lighting.
- Varying exposure and/or flash compensation as well as the position of the external diffused flash (bounced or straight on), gives even more flexibility still.
- If the bug gives you the opportunity, try various possibilities.
The previous section on Camera Equipment has pointers to some of the equipment mentioned here.
Tripod or Not?
About 90% of my bug shots are handheld. I think this is one of the major advantages of a prosumer digital with a flip out LCD screen. When I do use a tripod, I may use a macro focusing rail (or slider) that allows you to move the camera back and forth in tiny increments without moving the tripod. Given that the DOF is so shallow in macros and that I prefer to lock the focus and move the camera back and forth, the rail is a useful tool.As I noted above, most of my shots are handheld. As such, I have become quite good at steadying the camera. I do this in a number of ways. I will often lean against a tree or fence. I keep my elbows in and often squat bracing the camera against my knee/leg. If I can, I will rest the edge of the camera on a log or other available structure. I also either put the camera cord around my neck or in my teeth and push the camera away from me when I shoot. I sometimes play with monopods.
How to Get Close
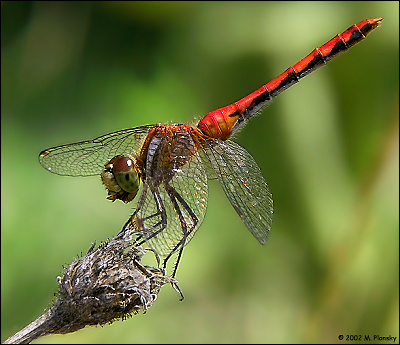
The philosophy I discussed earlier is relevant here. To me, photographing bugs is like hunting big game. You have to work for that trophy and being able to track and stalk the game are skills that the hunter develops.I especially enjoy dragon hunting, although over the years, I have grown find of all the different flies. I don't go out at special times and I am not a morning person. I have about 3 acres that are about 15 minutes from a river and there are some marshlands in between. This, I am told, is why I am inundated with dragons at certain times of the year. Water seems to be a key when it comes to the dragons.
Here are some tips for getting close:
- Go slow. Be patient. Watch the bug for awhile to see how it behaves.
- Some of the bugs are more tolerant than others (both across species as well as within).
- Move slow. Try not to caste your shadow on the bug. If the bug takes off, be still and wait a minute or two, it will often return to the same perch.
- Different optical marriages and setups give you different working distances. Be sure to try out the various possibilities.
- When you find a bug that lets you get close, start firing that shutter like a maniac. Be prepared, such that all settings are as they should be, because you may only get one shot.
- As you master the focus and exposure, you can start looking for cleaner backgrounds and pay more attention to composition (placement of the bug in the frame).
The Digital Darkroom
The more the magnification, the less DOF you get. There is no getting around that. I try to use what little I get as best I can. Furthermore, I try to take the image such that it will not need much "developing" in the digital darkroom. In reality, I find that such perfect images are few and far between.When working in the digital darkroom, my goal is typically not to alter the image, but rather to improve upon what the camera gave me. Occasionally though, I will alter the image by adding clouds to the sky, cloning away unwanted items, or in rare cases, replacing the background.
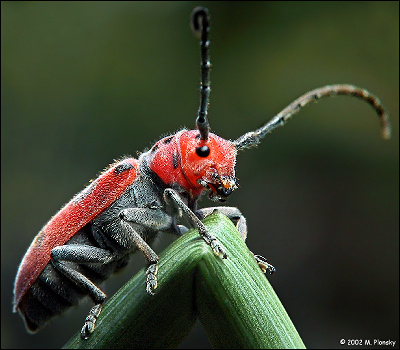
I have also worked on a technique of using more than one image (taken within seconds) that have different planes of focus and compositing them for increased DOF (I am most likely to do this with extreme macros because DOF is so limited there). The milkweed beetle shown here is an example. I wrote an article on this technique here.
Here are some digital darkroom tips:
- Take a lot of shots, trying to vary the plane of focus a bit on each so that you are likely to get a couple that hit the sweet spot so to speak.
- Get used to deleting most of the shots you take. As you gain skill, the hit rate goes up a bit (sometimes).
- Rotating, cropping, adjusting the levels curves, saturation, and contrast, as well as sharpening the subject and blurring the background are the basics of developing the image.
- Masking is hiding areas of the image, so that you can work on other areas without affecting the hidden areas. Typically one might mask the foreground so that the background (BG) can be worked on. I typically do this so that I can give the BG a bit of a blur to remove digital noise (since I don't have one of the high end digital SLR's that give relatively noiseless backgrounds). Creating a mask can be tedious and can be done lots of different ways. I like the "magic wand" tool that selects similar areas on the basis of color. I typically use that first and then refine the mask with other tools.
- Another tool I find useful in the digital darkroom is a graphics tablet, which allows me to use a pen instead of a mouse to control the cursor. I have a Waucom tablet.
I hope some of this information has been useful to you. If you like my images, you can see more in the Galleries.
Happy Hunting!